Wednesday, July 3, 2013

The wall hanging is ready

I finished the wall hanging some weeks ago. Then I had to find some kind of rod to hang it. And after finding one it took me a while to get around fotographing it.

So here it is:
wallhanging finished


It's a pity that I can't get the color of the wall right in pictures. It's a tad more yellow in reality. I've tried to take photos with and without direct sunlight. This was the best take yet.
Anyway the wall hanging matches very well with the color of the wall. :-))

You'll probably notice that the houses aren't very distinct, especially when viewed from a distance. I loved the color scheme so much, that I didn't make a real effort to solve that. My mind was set on that particular background fabric.

Remember the border issues? Well, I managed to get the puckering less noticeable.

In hindsight, I don't think the puckering was caused by tension problems after all. Once I finally figured out the right setting the Singer had no problems keeping that setting.
The foot might have made a difference though. The 127K came with a fixed foot, while my 15 has a hinged foot. I had been stitching the entire wall hanging with the 127K, but decided to put on the border with the 15. That's when I noticed that stitching with the hinged foot was easier.

When it comes to mitering corners I can't live without the reverse feature. That's why I wanted to use the 15.

Another thing I learned from stitching this wall hanging is that I need to iron the seams more precisely. Had I done that, then I would've noticed that I hadn't pressed some seams as neatly as I thought. So I didn't notice that I had caused some distortion that would get me in trouble later on.

The thing is, I try to avoid ironing if I can. It's a pain when you have cats. Every minute that I'm not using the iron I have to put it away in my shower and close the door. Cats are like toddlers. You wouldn't leave a hot iron unattended around little kids, would you?

Now imagine how that plays out when you're  doing paper foundation piecing: stitch one very short seam; press it; disconnect the iron, and put it in the shower. And go back to your sewing; stitch another short seam; collect the iron from the shower; heat it up again; press, and put it back in the shower. Well, you get the picture.

Anyway, I'll have to come up with a solution, because careful ironing does get you better results. I'm sure I'll think of something brilliant one day.........


Friday, June 28, 2013

Summer Dress

Lately I've been reading much about sewing garments in the blogs I follow daily. It's so enjoyable to read all about their adventures that I was totally in the mood to make something too.

As it happens I discovered only recently, at the age of 53 no less, that knee length dresses don't work for me because I'm short. So when that eye opening moment finally occurred I immediately started to shop for some new dress patterns.

This is the one I'm working on:
summer dress


The design is a princess line with short sleeves, button down closure, and a collar with stand. The sleeves are gathered, but only at the the top. Needless to say they were very easy to sew, since there was no easing involved.
Much to my delight the collar with stand went quite well too. I was a bit worried because I never made a collar with stand before.

collar with stand


I've sewn one side of the collar stand to the dress with the sewing machine. The inner side, which is pinned in the photo, is going to be hand sewn.
Now that I'm looking at the photo I'm not sure whether I should have sewn the inner stand to the dress, thus having the hand sewing hidden by the collar when I wear the dress. I'll keep it in mind for the next dress, and try how it looks when I do it the other way around.

collar and sleeves


I love how the sleeves turned out, but I'm not happy with how the buttonholes turned out. I used the regular sewing thread to make them. Perhaps I should have used a thicker thread. But how to thread the machine then? A thicker upper thread and the regular sewing thread in the bobbin? I have no idea. Luckily the buttonholes will be less noticeable once the buttons are sewn on. 

pocket


The pockets are a nice detail, I think.
This is a fun project overall. And several first times are involved, like making buttonholes, and a collar with a stand.This fabric, however was so cheap that I bought 6 meters of it. It's incredible, but the fabric cost only 1 Euro per meter, and the width is 1.40 m.!!! No wonder I didn't fret about making mistakes.

 The dress is being sewn using the Pfaff and the Juki.


Sunday, June 23, 2013

Meet the rest of the gang

Finally I have time to blog again. The past weeks I've been very busy, but not with fun stuff unfortunately.

Anyway, this post is about my other machines. Apart from my two hand machines I own four more.

The Singer 191B
Singer191B
Singer 191B


The 191B is the machine I learned to sew on. It was my Mum's, but she gave it to me when I showed some interest in learning to sew.  No zigzag, strictly straight stitch, and still going strong.
I have many fond memories of sewing on it, especially because my Mum was still alive the last time I used it, and some of the clothes I made on it I still have.

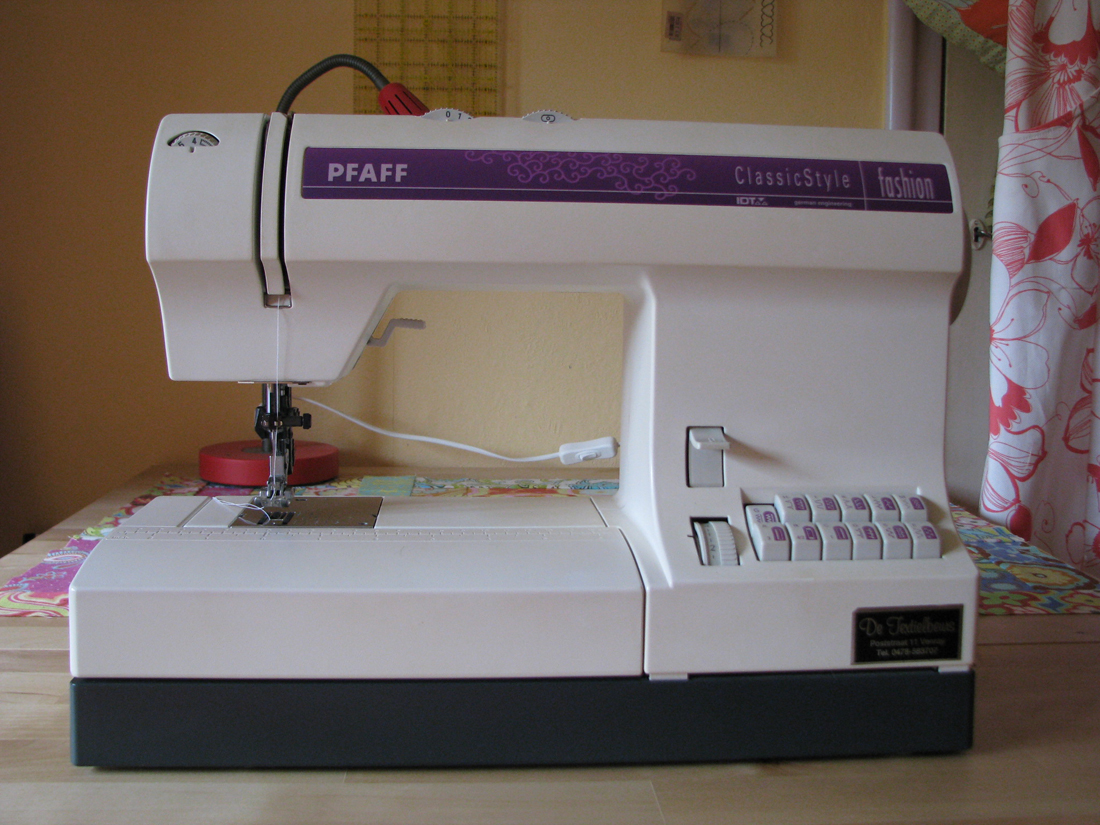
The Pfaff Fashion Select
Pfaff Select
Pfaff Fashion Select


The Pfaff is my go to machine when I sew clothes.
As you can see it's a mechanical machine. Apart from the money involved, I wasn't keen on computerized sewing machines. For one I wasn't sure to what extent the computer would automate things, leaving me with not enough control over it. And secondly the fuss of updating software, not to mention software issues.
Anyway, I'm very pleased with this machine. I love that you can change the needle position. I often use that feature to get an accurate seam allowance.
Then there's the built-in walking foot. I think it's brilliant. As a matter of fact it's the main reason for choosing a Pfaff in the first place.
The Pfaff walking foot can be engaged or disengaged in a split second. Furthermore it's never in the way,  and you can see exactly what you're doing at all times.
pfaff walking foot
Walking foot engaged


walking foot 2
Walking foot disengaged


The Janome CoverPro
janome coverpro
Janome CoverPro


The Janome CoverPro is very user friendly. It's very easy to thread. It produces very nice stitches.
Due to lack of sewing projects I haven't used it much yet, regrettably, because it really is a fun machine to sew on. I've experimented with 4 and 3 threads.
I believe you can also use it for chain stitching, but I've never tried yet.

There are two ways to cut the threads when you finish your stitching. It depends on whether the stitching will be secured by another seam or whether you want to stop in the middle of the fabric if you're doing decorative stitching. This how to video on YouTube explains it better than I can.

The Juki Overlocker
juki overlocker
Juki Overlocker


Last but certainly not least is my Juki Overlocker. My Juki was truly love at first sight. Or rather at first sound really. When I heard the sound of its motor the first time, that was it. I knew this was the one. It sounds ever so smooth, almost velvety if that makes sense. It's quite hard to describe.

It's a joy to use. Threading it is relatively easy. It's a bit intimidating at first but the more you do it the easier it gets. This particular model, the MO-654, has a lever which makes it easier to thread the lower looper thread. The most basic Juki overlocker doesn't have that feature.

I consider myself very fortunate. I own all the machines I ever desired.
And I cherish all of them.


Wednesday, May 15, 2013

Quilting

I love hand quilting. Back in the day (some 30 yrs ago) when I took a beginners class for making quilts, machine quilting wasn't as common as it is nowadays. The long arm machines remain expensive of course, but here in the Netherlands they were very hard to come by too.
Moreover, in my class hand quilting was considered the real thing.

Thanks to the internet and YouTube I now have a wealth of info at hand, which led me to the conclusion that machine quilting is a skill, requiring an equal amount of effort to become good at it. I'm glad, because it would be a pity to not appreciate craftsmanship.

I love to watch videos about free motion quilting, both on long arm and home sewing machines. It's quite a skill, and I was particularly impressed by this one video demo by Lizzie Lenard about free motion quilting on a treadle sewing  machine. 

So have I tried machine quilting yet?  I think so, but I'm not sure. In two projects I stitched in the ditch, yes, but I used the regular sewing foot and just stitched through all three layers. No lowered feed dogs, because my Singer 15 doesn't have that option anyway.
Although I made the usual beginner mistakes, I had so much fun! I definitely want to practice more on future small projects and just have fun with it.

Whether I'll take thing further and actually try free motion quilting, however, remains to be seen.
It's not that I don't want to learn, and it would definitely mean more finished project, not to mention the more elaborate designs that you're not likely to hand quilt.
But it's just as time consuming to learn as hand quilting. So at the moment I'm more inclined to focus on hand quilting.
And yes, I do feel like it's a choice. If you want to eventually excel in something you need to give it your all. It's also being aware of the person you are. By nature,  I find lots of skills interesting and exciting. So I can choose to keep on dabbling in all of them or focus on one and see what I can achieve.
Maybe I should have 10+ lives, all of them with good eyesight and a good pair of hands, of course :-)))


Anyway, before I get too philosophical, here are some pictures of my hand quilting.

quilted heart
This heart was my first project in a long time. I went for whole cloth, as I find it much easier to quilt than a patchwork top. You don't need to deal with seams, and this heart was a stencil, so it was a breeze to transfer it to fabric.

quilted heart back side
I obviously had some trouble with stitches not through and through. It's the rocking motion I have trouble with. The hard part for me is the moment after your needle has pierced all layers, when it's time to lay the needle flat to make the next stitch. I usually load 2 to 3 stitches on my needle, by the way.

Nils quilt motiv
I think I improved my technique slightly when I made Nils' memorial quilt. I forgot to take a picture of the back. At least the stitches are more uniform, albeit not very small.

squares hand quilting
Like I mentioned before, I find it a lot harder to quilt a patchwork top. I always manage to have seam allowances in the way somehow.
Apart from uneven stitches, I haven't quite mastered the whole rocking motion yet. The first stitch usually is the hardest. It can take me more than 20 attempts to get it right. My goal is to have less of a gap between that first stitch and the following stitches.

On the bright side, I'm delighted that I've made at least some progress. I'll just keep on practicing.


cat sleeping on lap frame
Lastly, a less obvious reason why hand quilting is time consuming: the cat factor.  

Wednesday, May 1, 2013

A few completed projects

Well, I've only completed very few projects really. I rekindled my love for patchwork fairly recently after a hiatus of over thirty years when I learned the basics.
In fact I started to hand quilt shortly before my cat Nils passed away last September. I adored Nils. He meant the world to me.

So the first picture is the doily I had started when he was still alive.

quilted doily
Hearts, hand quilted


I had no particular purpose for it in mind. I just felt like hand quilting something. The heart motif was easy to transfer, because it was a stencil. It's also easier to quilt a whole cloth than a patchwork top. because you don't have to deal with seams.

The next picture is the small memorial wall hanging I dedicated to Nils. I intended it to be bigger, including a matching quilted border. But I was in mourning and hadn't planned it properly, so I just added a binding to it.

small wallhanging
In loving memory of Nils


Not much later I purchased my first vintage sewing machine: the Singer 127K. And shortly after that came the Singer 15. Of course I was excited about using one of them, so I made this log cabin tablecloth using the Singer 15.

tablecloth


This one is also hand quilted, but only two squares per block.

After that I made a place mat of sorts for my 127K, so the machine wouldn't damage my table.

placemat


And with this place mat I took things a little bit further: I machine quilted it!

placemat detail


I quilted in the ditch, or rather I tried to, but I had a blast. It was so much fun!
This was done on the 127K hand crank. Of course due to the small size it was quite easy to feed the fabric through the machine.
The wall hanging, that I'm currently working on, is much bigger. I intend to sew very very slowly on that one.

Lastly a picture of the back of the place mat.

placemat back side

Tuesday, April 23, 2013

Waiting in the wings

After I finished a tablecloth for my cutting table in my sewing room, I had plenty of fabrics left for a smaller one. Very convenient actually, because by that time I had purchased both my hand crank machines, and I was looking for a simple project to use one.

I've always had a soft spot for log cabin quilts. They are fun to sew, and I love how you can play with a variety of layouts. So, when I read about log cabin rulers by Marti Michell, I bought them in two sizes.
The photo shows the ruler for the widest strip size available: the 2"/1" ruler. It's the perfect ruler for jelly rolls, because all you need to do is cut the strips to the appropriate lengths.
log cabin ruler
Log Cabin Ruler


detail log cabin ruler

As you can see in the closeup picture, the strips you cut are the exact length of each individual strip. Which means that you don't need to cut excess fabric once you've added a new strip. I find that very helpful in keeping the blocks square.

What the picture only shows a glimpse of, is that you can combine 1" and 2" strips to make off-center log cabin blocks.

A picture of the small tablecloth:
tablecloth log cabin


Since this was done with the jelly roll leftover, the blocks are quite big.
For my next log cabin quilt, I'm going to use the other ruler, because I want smaller blocks. So I'm going for  3/4" strips (finished size).  I hope I have enough fabric for a bed quilt.

The fabrics for the new log cabin quilt:


The red and yellow are accurate, but for some reason the soft green looks like turquoise. I have a very specific block setting in mind, and 1 shade of red and yellow will do.

Lastly, just a fun picture of the new fabrics together with the Singer 127.
log cabin fabrics too

Friday, April 19, 2013

Border woes

overall view of wallhanging


Adding the three borders to my wall hanging didn't go well.
The seams of the first border puckered.  I should've taken the time to find out why, but I continued to sew them on instead. I was hoping to literally iron them out, I guess. ;-))

Anyway, prior to this project all I had done with the Singer 127K was a couple of test runs after I had oiled it. In other words, this was its first real project.

I had to tinker a bit with the stitch length when I started the paper foundation piecing, but the tension was fine. And remained fine most of the time.
But this is what I couldn't figure out: occasionally the tension setting changed apparently, particularly when I hadn't used the machine for a couple of hours. And then I would have to find the correct setting again first and continue to sew.

Now, I'm a beginner when it comes to hand crank machines. I'm not sure how they're supposed to behave. My first sewing machine was an electric Singer 191B. I still have it, by the way.
As I recall I hardly ever had to adjust the tension on it. It would sew anything.

Anyway, after trying every setting of the upper tension I resorted to adjusting the screw on the shuttle by turning it 1/8" anticlockwise. As a result of that the seams of the last border strips were fine.

Of course I still need to unpick all the borders, and start over. Hopefully the tension won't give me any more problems this time around. However, if the tension problems keep reoccurring I obviously haven't solved the problem. I feel I need a professional to have a look at it.
But first I'm going to start over with the borders, and see how it'll play out.

Time to show and tell, so here's some more pictures I took. Come to think of it,  maybe it wasn't just the tension issues. After I added the first border I removed the paper foundation. Some parts of the houses stretched a bit. I chalked it down to how the pieces were cut. I hadn't paid any attention to the grain. After all, the paper foundation acts as a stabiliser. Maybe I should've left it in.


detail puckerd borders
detail puckered borders